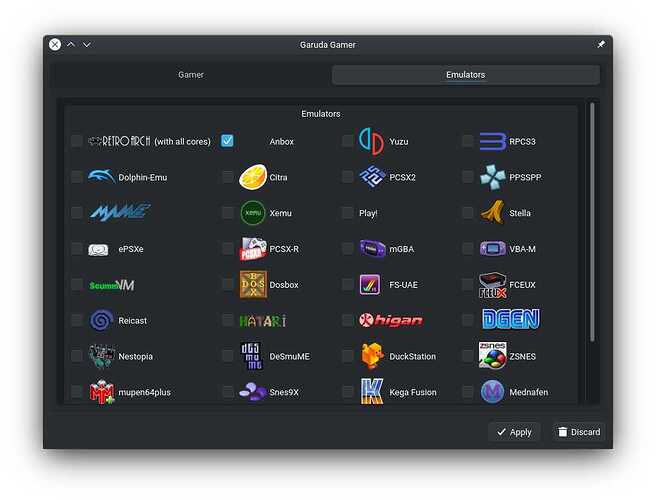
Anbox is deprecated now as its development has stalled, and its founding developer has acknowledged this.
There are other alternatives:
- Anbox Cloud (for cloud)
- Waydroid (for desktop use)
You can check out our Waydroid installation guide:
The guide will be available here for any references.
While trying to get Anbox running, you would probably get stuck somewhere and find it all confusing, just like it was for me before getting it running.
I have made this guide so that it would be a lot easier for you to get Anbox running!
These steps should work for everyone, and I have ensured every step is explained well enough so that even someone new to Linux can do it!
ArchWiki:Archive - ArchWiki (refer to this for more information regarding kernel modules)
1. Installing required modules:
- Install anbox-modules-dkms(check out this link for more information, recent updates and prevailing issues if any), which provides binder and ashmem modules.
sudo pacman -S anbox-modules-dkms
This installs the required binder and ashmem modules for any kernel.
2. Reboot
3. Installing Anbox:
You can install it from Garuda Gamer → Emulators. It will install Anbox with all necessary dependencies and even Google PlayStore!
or just run the command:
sudo pacman -S anbox-support
4. Enable Anbox services:
automated with installing anbox-support
i) Configure Networking:
sudo systemctl enable --now systemd-networkd
ii) Enable the Container Manager Service:
sudo systemctl enable --now anbox-container-manager.service
iii) Enable the Session Manager Service:
sudo systemctl --user enable --now anbox-session-manager.service
5. Setting up Kernel Modules
i) To automatically load the ashmem & binder modules on boot(Kernel module - ArchWiki):
Create a file inside /etc/modules-load.d/, which contains the lines:
(sudo nano /etc/modules-load.d/anbox.conf)
/etc/modules-load.d/anbox.conf

binder_linux
ashmem_linux
(Save and exit)
You could refer this(anbox-modules-dkms) if needed.
ii) To automatically create mount points for the ashmem & binder modules at boot
(systemd - ArchWiki):
Create a file in /etc/tmpfiles.d/ with the content:
(sudo nano /etc/tmpfiles.d/anbox.conf)
/etc/tmpfiles.d/anbox.conf

d! /dev/binderfs 0755 root root
d! /dev/ashmem 0755 root root
(Save and exit)
iii) To automatically mount the binder modules on boot, add a line in the fstab. Using the option nofail here will not greet you with a recovery shell when you are booting a kernel without binderfs support (such as the standard kernel):
(sudo nano /etc/fstab)
/etc/fstab

none                         /dev/binderfs binder   nofail  0      0
(Save and exit)
You can skip iv) & v) steps if you reboot after the iii) one.
iv) Load ashmem and binder modules without reboot (Kernel module - ArchWiki)
sudo modprobe binder_linux devices=binder,hwbinder,vndbinder,anbox-binder,anbox-hwbinder,anbox-vndbinder
sudo modprobe ashmem_linux
v) Mount the binder modules:
(mkdir(1) — Arch manual pages)
(mount(8) — Arch manual pages)
sudo mkdir -p /dev/binderfssudo mount -t binder none /dev/binderfs
6. Now to check the required modules are loaded and mounted automatically on boot, run:
sudo ls -1 /dev/binderfs
It should give a somewhat similar output(may even vary, it’s ok):
❯ ls -1 /dev/{ashmem,binder}
/dev/ashmem

/dev/binder
binder
binder-control
features
hwbinder
vndbinder
(The ashmem directory wouldn’t show any modules.)
If the modules are all up and running, you should now be able to launch Anbox from your application menu!
7. If you want to use adb to debug, install android-tools:
sudo pacman -S android-tools
8. Once you have the APK package for the application, you can install it into the Android container with the following command:
adb install my-app.apk
This post is a simplified version of this one: https://forum.garudalinux.org/t/a-little-help-with-anbox/
There you are, enjoy Android Apps in Garuda Linux!


 and at this moment I didn't have time to "study" on it a bit ...