How I installed every Garuda spin on one partition
Inspired by @dalto’s post here, for the past few months I have been experimenting with adding multiple Linux installations to a single Btrfs partition using subvolumes. In this topic, I describe how I have installed every Garuda Raptor spin on one partition with this method, using the rEFInd Boot Manager to easily boot to any of the installations, with options for extra kernels and fallback images. In this setup, an option for booting to Grub is preserved as well for easily booting into Snapper snapshots with grub-btrfs.
This topic is largely intended to showcase Btrfs subvolume multibooting and the rEFInd boot manager, but is written in the style of a how-to in case anyone would like to follow along, or adopt a few ideas into their own setup. A much simpler version of this guide, without the rEFInd setup and some of the other steps, has been posted on the Garuda Wiki here: Multiple installations on one partition | Garuda Linux wiki
Like all multibooting setups, this should be considered not offically supported by the Garuda team. Multibooting adds extra layers of complexity to a system that can make troubleshooting more difficult. Be warned that manipulating subvolumes and bootloader configurations like described in this topic can make your system unbootable if you make a mistake.
Why would anyone do this?
I’ll admit, thirteen installations is a bit much. Keeping them all up to date is bound to grow a little too time consuming. Sooner or later I will let a few of them go to free up some space on the disk.
But that’s just the thing: adding an installation I want to test out–or removing it when I am done–is trivial when the installations are contained in subvolumes. Adding partitions to the disk or resizing filesystems is not needed. You can set up a fresh installation in less than ten minutes, tinker around for an hour or two, and then blow away the subvolumes when you are done and it’s like it was never there.
This provides a nice alternative to testing a distro in a virtual machine. Having the installation “on the metal” often yeilds a better performance, and eliminates the possiblity of unexpected behavior caused by virtualization.
This is also a great way to enjoy having multiple desktop environments. Installing one desktop environment on top of another can cause conflicts and breakages, many of which can be difficult to troubleshoot. Keeping them as separate installations allows you to configure each system as deeply as you wish without having to worry about breaking something on another desktop environment.
Thanks to subvolumes, it is easy to share files or directories between your systems. Multiple systems can share a common subvolume, or If you need something from your other installation that isn’t stored on a shared resource you can always just reach into its subvolume and grab it.
Above all, I found this project to be a fun way to learn more about the interesting and complex features of Btrfs.
Getting started
- A Btrfs filesystem is needed for this, obviously. One long, contiguous Btrfs partition on your disk is best.
- An EFI partition is needed as well, since we are using the rEFInd Boot Manager. Systems that boot in legacy (BIOS) mode without an EFI partition can still multiboot with subvolumes, but will need to set it up with Grub only which has some disadvantages (it is much more difficult to organize when you have a lot of installations up, especially the bootable snapshots).
- Encryption is a perfectly worthy consideration, and is absolutely possible with this kind of setup. However, an encrypted setup is beyond the scope of this topic.
Rename the default subvolumes
Create a mount point outside the top-level subvolumes. In my example here, my Btrfs partition is on nvme0n1p2. Obviously change that to whatever your Btrfs partition happens to be.
sudo mkdir /mnt/top-level_subvolume
sudo mount -o subvolid=0 /dev/nvme0n1p2 /mnt/top-level_subvolume
cd /mnt/top-level_subvolume
Rename all the subvolumes. Replace gnome , gnome_cache, etc with whatever names you wish to use for your subvolumes.
sudo mv @ gnome
sudo mv @cache gnome_cache
sudo mv @home gnome_home
sudo mv @log gnome_log
sudo mv @root gnome_root
sudo mv @srv gnome_srv
sudo mv @tmp gnome_tmp
It is customary to mark these subvolumes with “@”. This convention can be preserved or not depending on your preference. In this setup I have decided not to use “@” in the subvolume names.
Update /etc/fstab
It is important to get your /etc/fstab updated before you reboot. Take extra care to ensure the entries are accurate.
Update the subvol= values to the new names (i.e. subvol=@ should be changed to subvol=gnome, and so on.) For example:
<device>                                  <mount point>  <type>  <options>
UUID=xxxx-xxxx                            /boot/efi      vfat    defaults,noatime 0 2
UUID=xxxxxxxx-xxxx-xxxx-xxxx-xxxxxxxxxxxx /              btrfs   subvol=/gnome,noatime,compress=zstd 0 0
UUID=xxxxxxxx-xxxx-xxxx-xxxx-xxxxxxxxxxxx /home          btrfs   subvol=/gnome_home,noatime,compress=zstd 0 0
UUID=xxxxxxxx-xxxx-xxxx-xxxx-xxxxxxxxxxxx /root          btrfs   subvol=/gnome_root,noatime,compress=zstd 0 0
UUID=xxxxxxxx-xxxx-xxxx-xxxx-xxxxxxxxxxxx /srv           btrfs   subvol=/gnome_srv,noatime,compress=zstd 0 0
UUID=xxxxxxxx-xxxx-xxxx-xxxx-xxxxxxxxxxxx /var/cache     btrfs   subvol=/gnome_cache,noatime,compress=zstd 0 0
UUID=xxxxxxxx-xxxx-xxxx-xxxx-xxxxxxxxxxxx /var/log       btrfs   subvol=/gnome_log,noatime,compress=zstd 0 0
UUID=xxxxxxxx-xxxx-xxxx-xxxx-xxxxxxxxxxxx /var/tmp       btrfs   subvol=/gnome_tmp,noatime,compress=zstd 0 0
tmpfs                                     /tmp           tmpfs   defaults,noatime,mode=1777 0 0
It is not needed, but if you would like you can re-mount the partitions at this point. If there is an error in fstab it should be announced when you remount.
sudo systemctl daemon-reload
sudo mount -a
Update Grub
Change the name of the boot directory from “Garuda” to something else so it won’t create a conflict when you install the next ISO. The next installation will also name the boot directory “Garuda”, which will simply overwrite any directory with the same name (this would make our first installation unbootable).
sudo mv /boot/efi/EFI/Garuda /boot/efi/EFI/Gnome
Change the GRUB_DISTRIBUTOR= line in /etc/default/grub to match whatever you just named the boot directory in /boot/efi/EFI/.
sudo micro /etc/default/grub
GRUB_DISTRIBUTOR="Gnome"
If this line does not match the name of a directory in /boot/efi/EFI (the one we just changed above), when you run the grub-install script it will automatically make a completely new directory.
Optionally, disable the Grub OS-prober. OS-prober will not be needed since we will be using rEFInd, and disabling it will make the Grub menu much less crowded when we do boot to Grub for restoring a snapshot.
Find the line that says GRUB_DISABLE_OS_PROBER=false and comment it out by adding a # in front of the line.
#GRUB_DISABLE_OS_PROBER=false
Next, run the Grub installation script.
sudo grub-install ...
I have put “...” to mean “add whatever options are specifically relevant for your Grub installation”. In some cases, grub-install or grub-install --no-nvram is enough. If you are not sure, refer to the document here: GRUB - ArchWiki
Regenerate the Grub configuration file.
sudo update-grub
It is fine to reboot here if you wish; at this point you should be all set to get back into your new installation with Grub.
Configure rEFInd
Install the rEFInd package:
sudo pacman -S refind
Run the refind-install script:
refind-install
Setting up a boot stanza
For the purpose of this topic, I will just set up a quick and easy boot stanza that will chainload the Grub bootloader. This will allow using the rEFInd boot manager to keep the multiple installations organized, without going too in depth regarding boot stanza configuration.
A boot stanza is capable of much more configuration, including booting the installation directly without using Grub at all. For those interested, writing a boot stanza is discussed in more detail in this wiki post: Writing a rEFInd Boot Stanza | Garuda Linux wiki
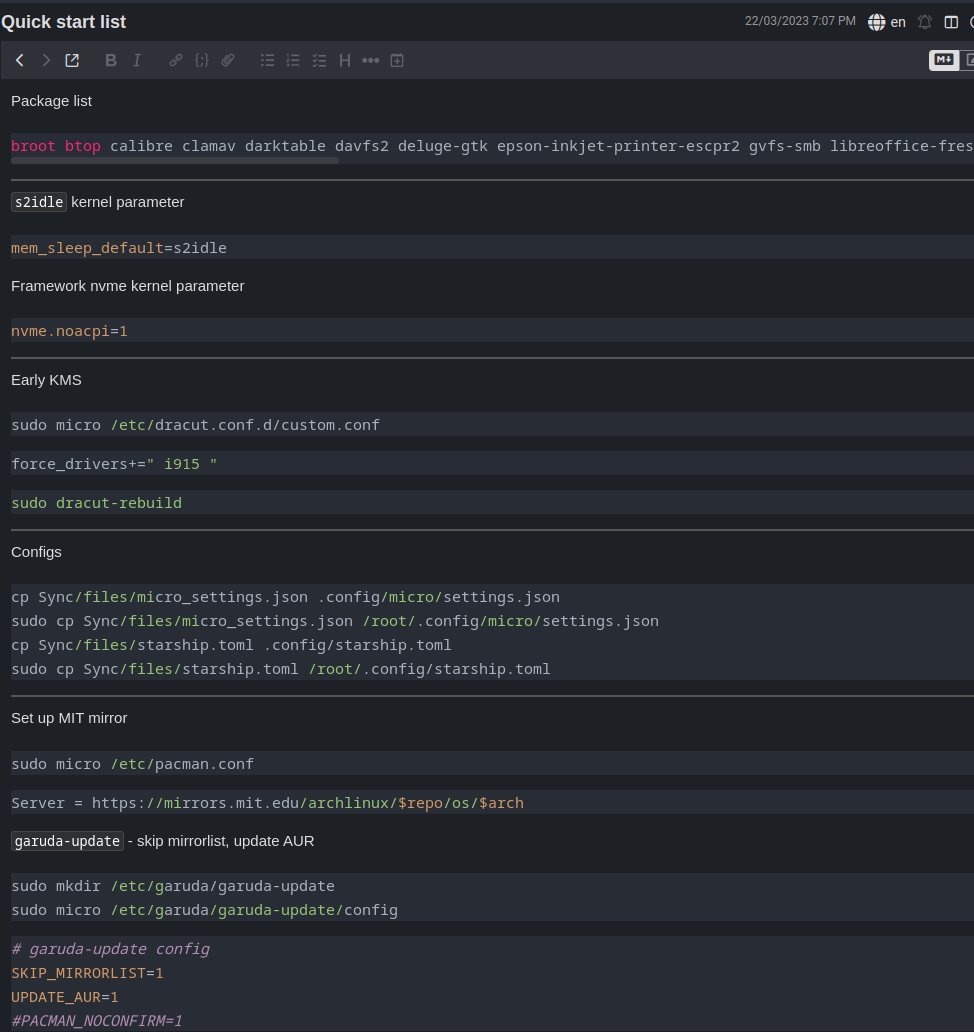
The rEFInd Config
Open refind.conf in your editor. Since it is on the EFI partition, you will have to open it with sudo or as root.
sudo micro /boot/efi/EFI/refind/refind.conf
Scroll all the way down to the bottom of the file. You will see many boot stanza examples on the way down, with disabled written in as the last option–this is a simple way to disable a boot stanza, instead of commenting out the whole thing line by line.
Find some space in the file to set up your stanza. It can be before or after the example stanzas–it doesn’t really matter, except that whatever order the boot stanzas are in will be the same order the entries appear in the rEFInd menu.
The basic layout of the stanza will look like this:
menuentry Gnome {
    icon    /EFI/refind/gnome_logo.png
    volume  EFI
    loader  /EFI/gnome/grubx64.efi
    graphics on
    }
menuentry
The menuentry can be named whatever you like, however if it contains a space (more than one word) you must enclose it in quotes (for example, “Garuda Gnome”).
[details=““Show me!””]
A menuentry value with no space:
menuentry Gnome {
	...
A menuentry value with a space:
menuentry "Garuda Gnome" {
	...
[/details]
icon
The icon entry is the path to the icon relative to the EFI partition (i.e. /boot/efi). So to use the Arch icon at /boot/efi/EFI/refind/icons/os_arch.png, you write in the stanza /EFI/refind/icons/os_arch.png.
There is a default icons directory at /boot/efi/EFI/refind/icons, which has an assortment of .pngs for some popular Linux distros, or you can use a custom icon.
[details=““Show me!””]
The easiest way to set up your custom icon is to save it on the EFI partition. I recommend not saving it in /boot/efi/EFI/refind/icons because the directory gets overwritten (rather, saved to a backup file) when the refind-install script is run. You will have to restore the directory to get your icons back in that case.
Instead, either make your own directory or just store them in /boot/efi/EFI/refind. For the latter case, you would describe the path in your stanza like so:
icon /EFI/refind/MY_CUSTOM_ICON.png
Again, the path is relative to the EFI partition (i.e. relative to /boot/efi/ in a default Garuda setup).
volume
For booting to Grub, the volume entry is the partition name, the filesystem label, or the PARTUUID–not the filesystem UUID–of the EFI partition.
If you named the partition during the installation process (or afterward), just use that because that will be the easiest. Otherwise, you can use blkid to find the PARTUUID and use that instead.
[details=““Show me!””]
Run sudo blkid -s PARTUUID -o value /dev/sdXY, where sdXY is the EFI partition.
sudo blkid -s PARTUUID -o value /dev/nvme0n1p1
15a71d3d-f2ef-4513-8e6b-a65458ffbb75
Or, just run sudo blkid and find the PARTUUID= value for the EFI partition in the output.

Add that value to the volume entry:
menuentry "Garuda Gnome" {
	icon	icon	/EFI/refind/gnome_logo.png
	volume e798748f-c287-43e6-b675-cf376345f211
	...
[/details]
loader
In the case of booting to Grub, the loader entry points to the grubx64.efi file for that Grub installation. For refind.conf, write the path relative to the EFI partition (for example, /EFI/grub/grubx64.efi).
If you recall, back in the “Update Grub” section earlier in the topic, we renamed /boot/efi/EFI/Garuda to something else (in the example it was changed to /boot/efi/EFI/Gnome). That is the directory we need to point to in this submenu entry–just without the /boot/efi part since it is written relative to the EFI partition instead of the root partition.
graphics
The graphics option should be set to on if you wish for rEFInd to boot in graphics-mode. If you don’t set this, Grub will still load but it will be in a low-resolution mode that can make it difficult to see all the options in the menu on certain displays.
That’s all there is to it, the boot stanza is complete!
menuentry Gnome {
    icon    /EFI/refind/gnome_logo.png
    volume  EFI
    loader  /EFI/gnome/grubx64.efi
    graphics on
    }
Again, this is a very simple stanza that will just pass off the boot process to Grub. For more in-depth boot stanza configuration, see the wiki post mentioned above (Writing a rEFInd Boot Stanza | Garuda Linux wiki).
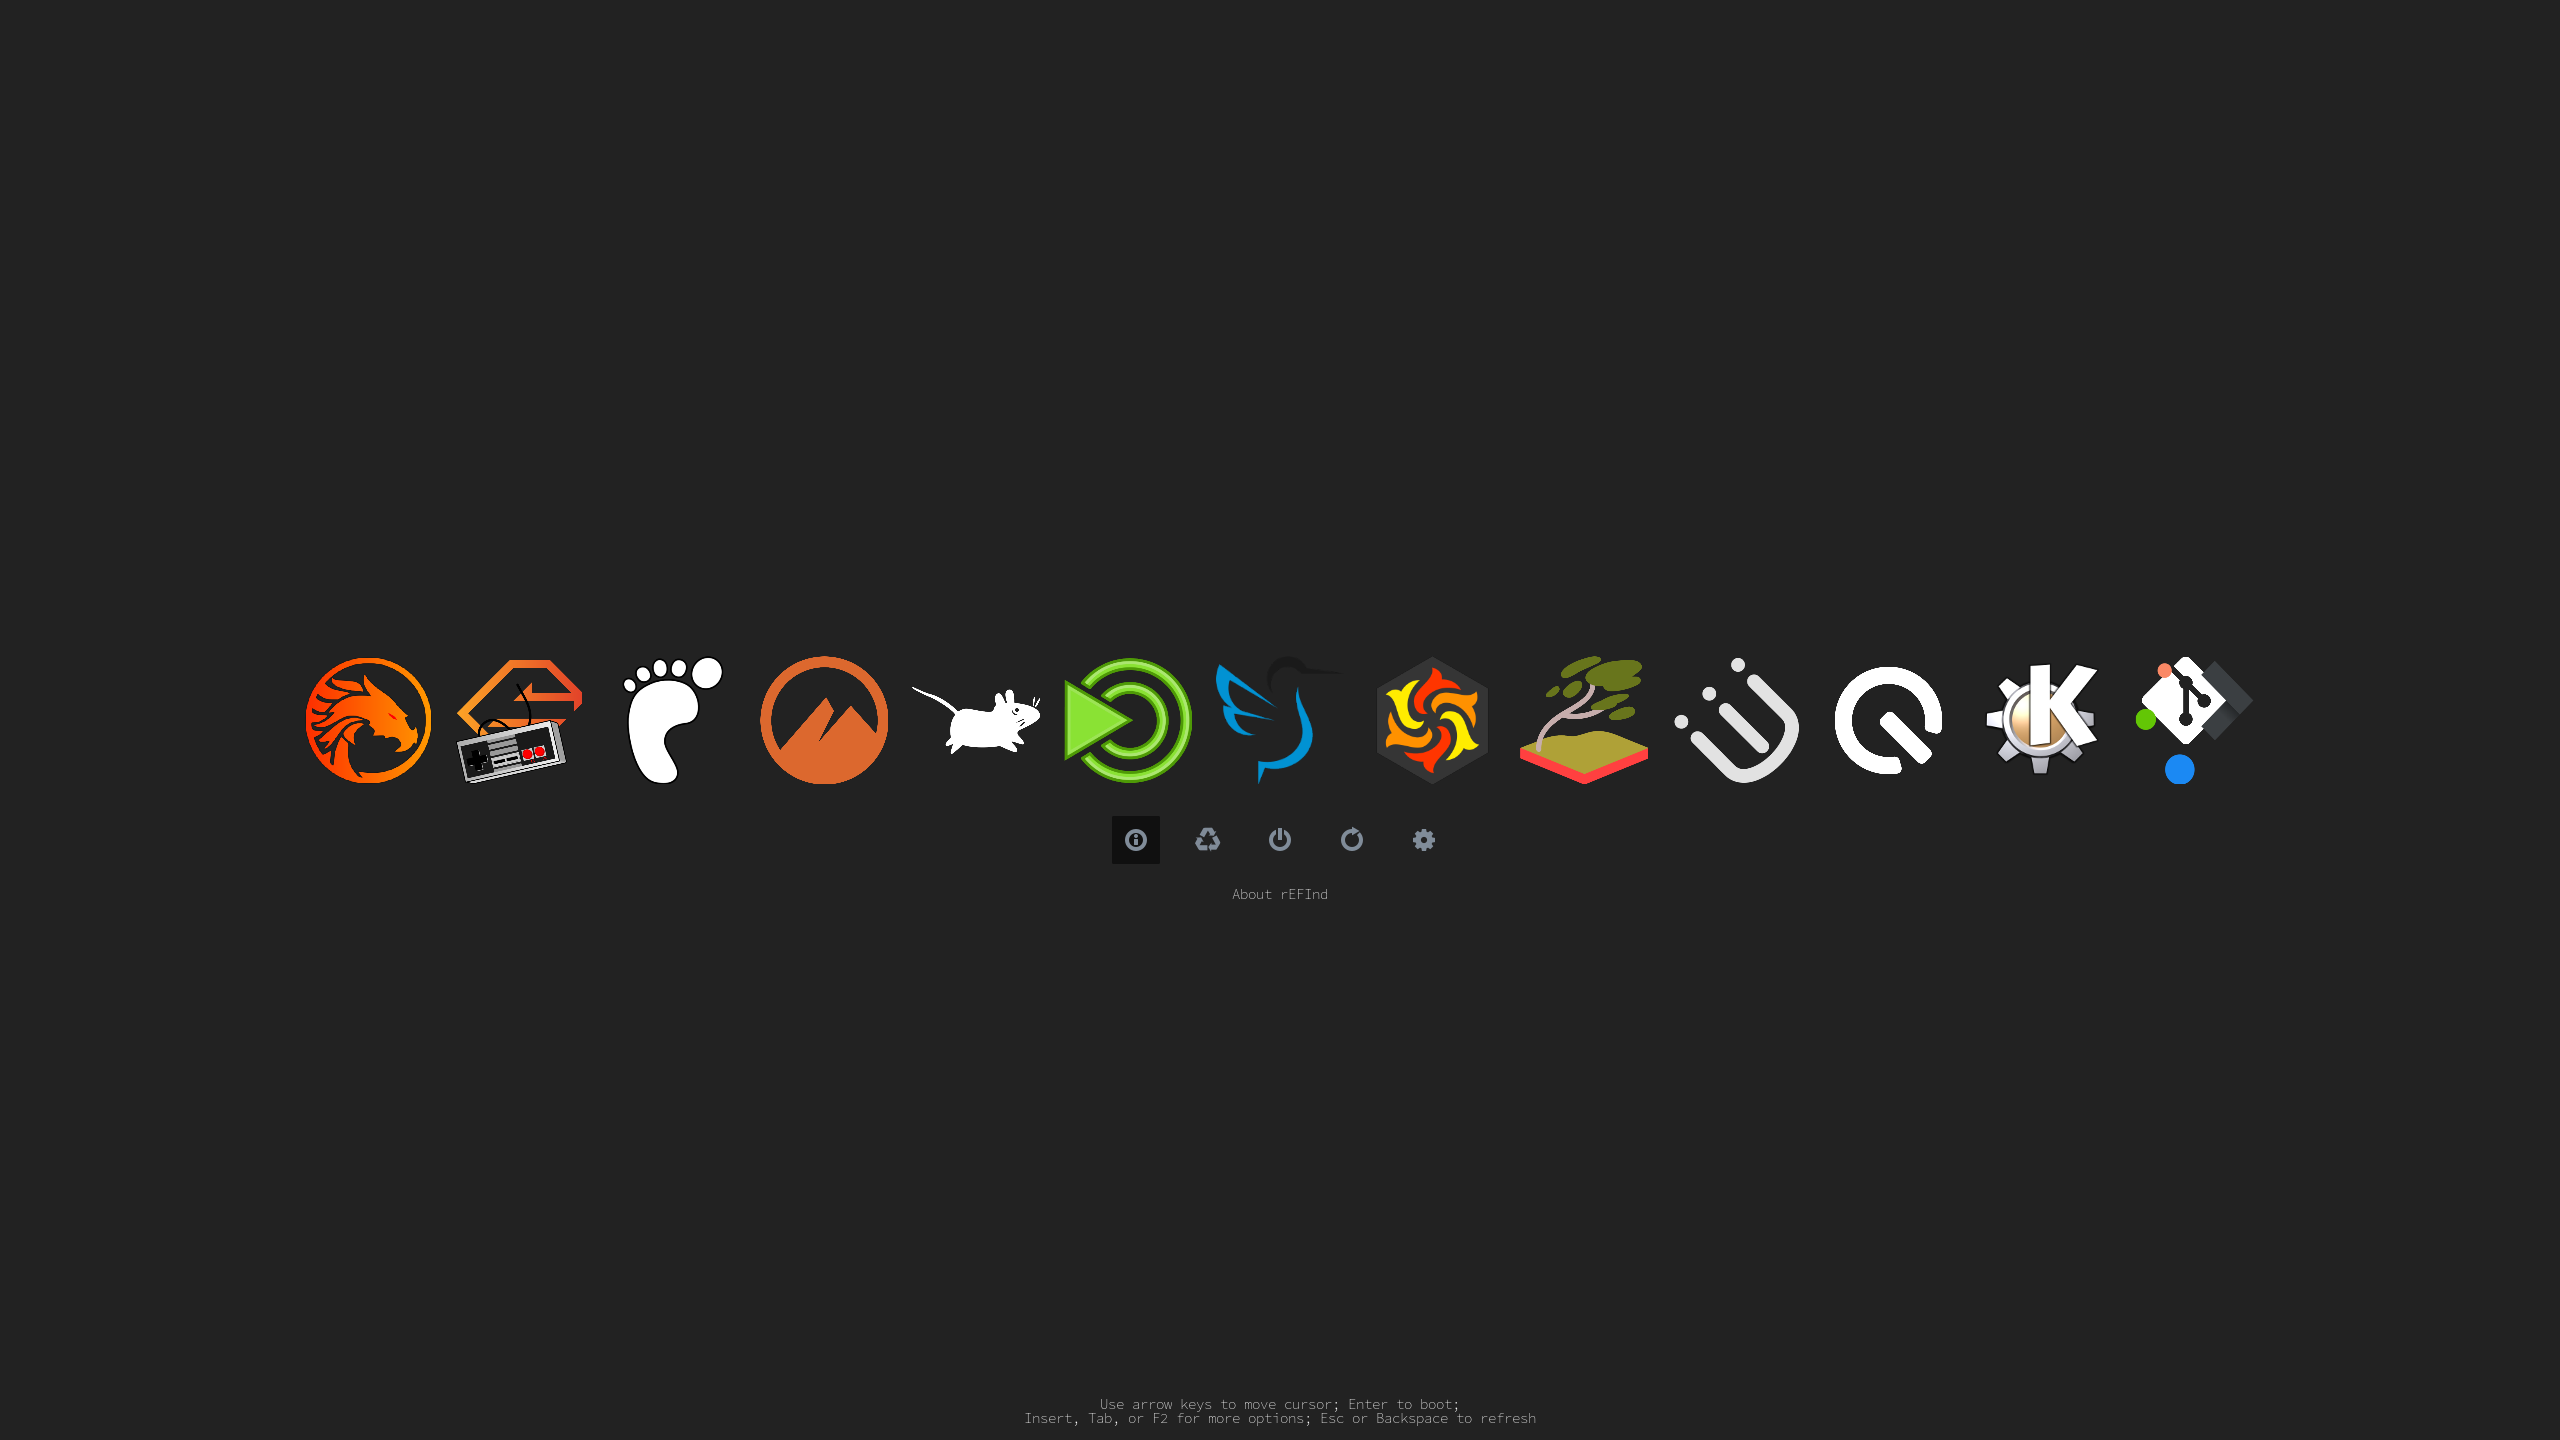
Clean up the Boot menu
After each install, rEFInd will automatically detect the grubx64.efi file on the EFI partition and will add a boot entry for it (it boots to Grub). It typically gets a Tux icon, unless you install a distribution that is associated with an icon in /boot/efi/EFI/refind/icons–in which case it will get whatever the icon is.
Once you have Grub set up as a submenu entry in your boot stanza, these auto-generated boot entries are no longer needed–they only add unnecessary clutter to the boot menu. You can hide them by pressing Delete and confirming on the prompt that you would like to hide that boot option.
This feature doesn’t actually delete anything; you can retrieve the boot option any time you like by entering the “hidden tags” menu and choosing to restore it.
Install a rEFInd theme
Optionally you may install a theme to stylize your rEFInd boot menu however you wish. There are tons of themes available to choose from; check out some of the options available on GitHub here: refind-theme · GitHub Topics · GitHub
In the examples in this topic I am using the “Regular” theme, available here: GitHub - bobafetthotmail/refind-theme-regular
Add another installation
It’s time to install another spin! Boot to the installer from a USB like you would normally do. Choose the manual partitioning option.
Select the EFI partition and click on Edit. Be very careful with the selections you make–you want to keep the contents of the partitions–do not format or you will lose the first installation.
EFI partition:
- Content: Keep
- Mount point:
/boot/efi
Next, select the Btrfs partition and click on Edit.
Btrfs partition:
- Content: Keep
- Mount point:
/
While you are adding the mount points, consider adding a filesystem label if you haven’t already. You can use the filesystem label instead of the PARTUUID for the
volumeentry on your boot stanzas.
That’s it! Proceed with the installation.
Once you are booted into the fresh installation, the initial setup is very similar to the first time around; I will summarize in brief anything already explained in more detail above, to have a short version easier to follow along.
Mount the top-level subvolume and rename the new subvolumes–the same process as the first distro, only this time obviously you should pick different names. Replace dr460nized, dr460nized_cache, etc with whatever names you wish to use for your subvolumes, and nvme0n1p2 with whatever your Btrfs partition is.
sudo mkdir /mnt/top-level_subvolume
sudo mount -o subvolid=0 /dev/nvme0n1p2 /mnt/top-level_subvolume
cd /mnt/top-level_subvolume
sudo mv @ dr460nized
sudo mv @cache dr460nized_cache
sudo mv @home dr460nized_home
sudo mv @log dr460nized_log
sudo mv @root dr460nized_root
sudo mv @srv dr460nized_srv
sudo mv @tmp dr460nized_tmp
Edit your /etc/fstab with the new subvolume names.
micro /etc/fstab
Edit the name of the boot directory, and change the GRUB_DISTRIBUTOR line in /etc/default/grub. Disable OS prober by commenting the =false line.
sudo mv /boot/efi/EFI/Garuda /boot/efi/EFI/Dr460nized
sudo micro /etc/default/grub
   ...
   GRUB_DISTRIBUTOR="Dr460nized"
   ...
   #GRUB_DISABLE_OS_PROBER=false
   ...
/etc/default/grub-btrfs/configwith the subvolumes to exclude when scanning for snapshots–see “Clean up the snapshots boot menu” below.
Reinstall Grub and regenerate the Grub configuration file.
sudo grub-install --no-nvram
sudo update-grub
Install rEFInd.
sudo pacman -S refind
Set rEFInd as the default bootloader.
sudo refind-mkdefault
[details=““What’s this refind-mkdefault? What happened to refind-install?””]
Running the refind-install script is only necessary on the first installation, to get everything set up on the EFI partition and make a NVRAM entry. On subsequent installations, running refind-mkdefault is enough.
refind-mkdefault is a script that checks if rEFInd is the default boot option, and changes it to the default if not–basically an alternative to messing around with efibootmgr. It is handy because if you need to reinstall Grub for any reason it will re-set itself as the default bootloader, and this script will easily fix it for you.
An advanced use of this script would be adding it to a startup task or similar, as described in the man page:
“The intent is that refind-mkdefault can be called after booting via GRUB or some other means to restore rEFInd as the default boot program. It can also be placed in a startup and/or shutdown script to restore rEFInd to its default position automatically. Because it does not re-write the boot order if rEFInd is listed as the first boot entry, this practice should be low in risk.”
There is no harm in running refind-install on every installation (your configs will not be overwritten) but it is overkill and will also restore the icon library to default every time you run it. If you have custom icons you are saving in /boot/efi/EFI/refind/icons, it will save the directory as a backup file and your icons will be gone from your boot screen until you restore it.
[/details]
Set up your boot stanza in refind.conf.
[details=““Show me!””]
sudo micro /boot/efi/EFI/refind/refind.conf
menuentry "Garuda Dr460nized" {
    icon    /EFI/refind/dr460nized_logo.png
    volume  EFI
    loader  /EFI/dr460nized/grubx64.efi
    graphics on
    }
[/details]
Clean up the snapshots boot menu
Although at this point we have a separate Grub menu for each installation, and OS-prober has been disabled so there are not tons of boot options crowding the menu, there is still an issue with snapshots–namely, all snapshots on all subvolumes are detected and added to each Grub menu.
You may pull up the Cinnamon Grub menu to restore a snapshot, but the Cinnamon snapshots are all intermixed with snapshots from LXQT and Gnome and Sway, and depending on the snapshot limit set in /etc/default/grub-btrfs/config (default is 50) there may not even be that many Cinnamon snapshots to begin with–the 50 snapshot limit gets eaten up by the snapshots from other installations!
To resolve this, open /etc/default/grub-btrfs/config and find this line:
GRUB_BTRFS_IGNORE_PREFIX_PATH=("var/lib/docker" "@var/lib/docker" "@/var/lib/docker")
Here, you can specify a directory or subvolume which will be recursively ignored while scanning for snapshots. The Docker paths are included there by default; it is fine to leave them as they are or delete them if they are not needed, according to your preference.
What you want to do is list out all the root subvolumes (except the one your are booted into) and add them to this line. The root subvolumes are the ones that have been renamed from “@” all the way in the beginning of this topic, in the “Rename the default subvolumes” section. If it helps to see them printed out, run something like this:
sudo btrfs subvolume list / | grep "level 5 "
For example, if I am setting up a multiboot installation and the other installations have root subvolumes named “gnome”, “dr460nized”, “xfce”, “cinnamon”, and “wayfire”, I would set this line up like so:
GRUB_BTRFS_IGNORE_PREFIX_PATH=("var/lib/docker" "gnome" "dr460nized" "xfce" "cinnamon" "wayfire")
(I left one of the Docker directories on there for the example. If you use Docker, you will have to decide what is the appropriate option to use in your case.)
Next, while you are in /etc/default/grub-btrfs/config, there is another line in this file which should be changed:
GRUB_BTRFS_IGNORE_SPECIFIC_PATH=("@")
This is a similar idea, but it is a non-recursive path. Basically it keeps the actual system subvolume from showing up on the snapshot menu. This value should be changed from “@” to whatever you have named the root subvolume.
After you have finished editing the file, run sudo update-grub. Instead of 50 snapshots from all different distros, you should see only snapshots relevant to the system you are booted into.
You will have to set up this file on each installation you have. Optionally, consider setting this file up before setting up /etc/default/grub so when you regenerate the Grub configuration it is not cluttered with extra snapshots right off the bat.
If you add any more installations after /etc/default/grub-btrfs/config has already been set up, you will have to circle back and add the new root subvolume to the IGNORE_PREFIX_PATH list.
Deleting an installation
Deleting an installation is a simple matter of deleting the subvolumes it is contained in. It can be a little tricky in the case of subvolumes that contain read-only subvolumes, such as with snapshots. The main thing to remember is you need to delete the nested subvolumes first in this case.
Subvolumes that do not contain read-only subvolumes can be removed with plain old rm -rf. You will need to elevate, since these subvolumes are owned by root.
rm -rf, especially when elevated. You can easily destroy your system by targeting the wrong subvolume or directory.
Read-only subvolumes can be deleted with btrfs subvolume delete–but they cannot be deleted recursively. btrfs subvolume delete does support globbing though, so you can pass a wildcard for the numbered directory and delete them all at once. For example, using xfce as the root subvolume:
sudo btrfs subvolume delete xfce/.snapshots/*/snapshot
With the read-only subvolumes out of the way, you can now delete the top-level subvolume:
sudo rm -rf xfce
All that’s left is to clean up any lingering files on the EFI partition (/boot/efi/EFI/XFCE, for example), and to delete the boot stanza from refind.conf.
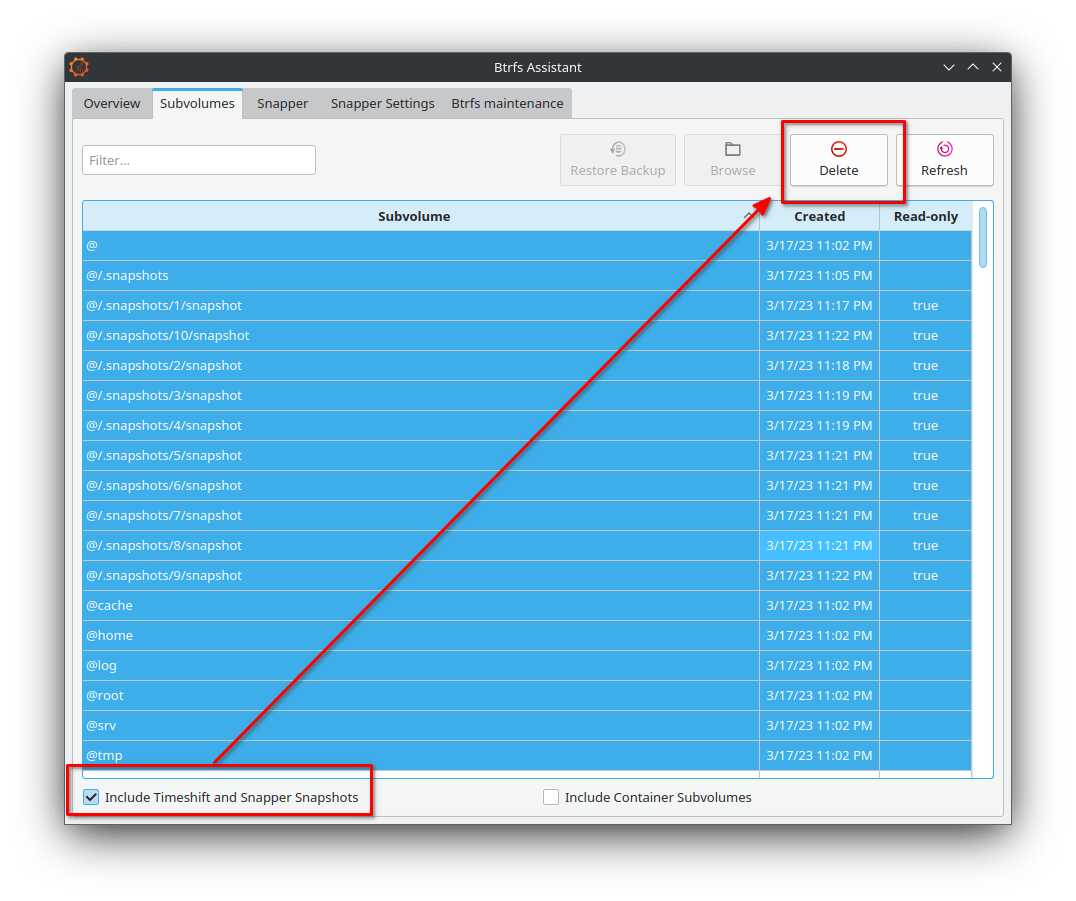
You can also use Btrfs Assistant to delete the subvolumes rather easily.
[details=““Show me!””]
Deleting the subvolumes in Btrfs Assistant is a simple matter of selecting the subvolumes and clicking on delete! Tick the “Include Timeshift and Snapper Snapshots” box if you would like those to be selectable from the menu as well.
Confirm when the prompt asks whether to delete subvolume metadata.
Subvolumes that contain nested subvolumes will initially fail to delete:
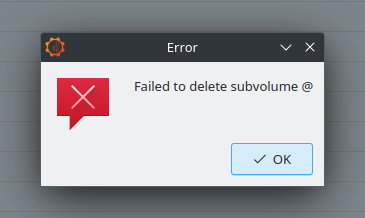
Deleting the nested subvolume will succeed, however, so you may simply re-select the subvolume that failed to delete and try again. In the typical case of a home subvolume (@ in this example) and a Snapper snapshots subvolume (@/.snapshots) it will take three tries to delete all the subvolumes.
[/details]
Additional considerations
A few worthy considerations that are beyond the scope of this already lengthy topic:
Deduplication
Deduplication is a process which involves identifying data blocks that are identical, but tracked separately, and combining them into an extent. Theoretically, with a multibooting setup like the one described in this topic, deduplication could free up a significant amount of disk space. This should be considered an advanced topic.
btrbk
This is a tool for easily backing up subvolumes to a separate filesystem–an external drive, for example. Consider making some btrbk backups before you get too in the weeds with deduplication. ![]()
Custom Grub config
The setup described in this topic will work perfectly fine without the rEFInd Boot Manager, however the default Grub configuration will list every installation as “Garuda linux on nvme0n1p2”, “Garuda Linux on nvme0n1p2”, “Garuda LInux on nvme0n1p2”, and so on. This makes it difficult to figure out which installation you want to boot to. If you want a pure Grub setup, it would be useful to make a custom Grub configuration so you can label each boot option however you wish.
refind-btrfs
Grub is fairly deeply integrated into some of the Garuda tooling, and not easy to remove without losing a lot of other stuff in the process. grub-btrfs is also an incredibly effective and easy-to-use snapshot restoration application. For the purpose of this topic, I have left Grub and grub-btrfs intact for these and other reasons.
However, booting into snapshots from rEFInd itself is also possible thanks to refind-btrfs. It handles snapshots a little differently than grub-btrfs (it maintains its own directory of read-write versions of snapshots for booting into) and lends itself to a different workflow (instead of “restoring” a snapshot and the snapshot automatically becoming the main system, the more obvious use case would be to boot into a snapshot for the purpose of repairing or rolling back the main system manually, then go back and boot to the main system), but it works great and is pretty simple to set up if you already have a manual boot stanza.
Closing thoughts
Hopefully you have found this topic useful or interesting. I am happy to read through questions or corrections in the comments, and don’t forget there is a significantly abridged version of this topic available in the Garuda Wiki here: Multiple installations on one partition | Garuda Linux wiki.