What's new with Garuda Sway?

As the Garuda team prepares for a new release, I have been finalizing some changes to the Sway edition. If anyone is interested in kicking the tires before the release, go ahead and grab the new ISO off the builds page (link below) and let me know what you think.

What’s new with Garuda Sway?

nwg-hello

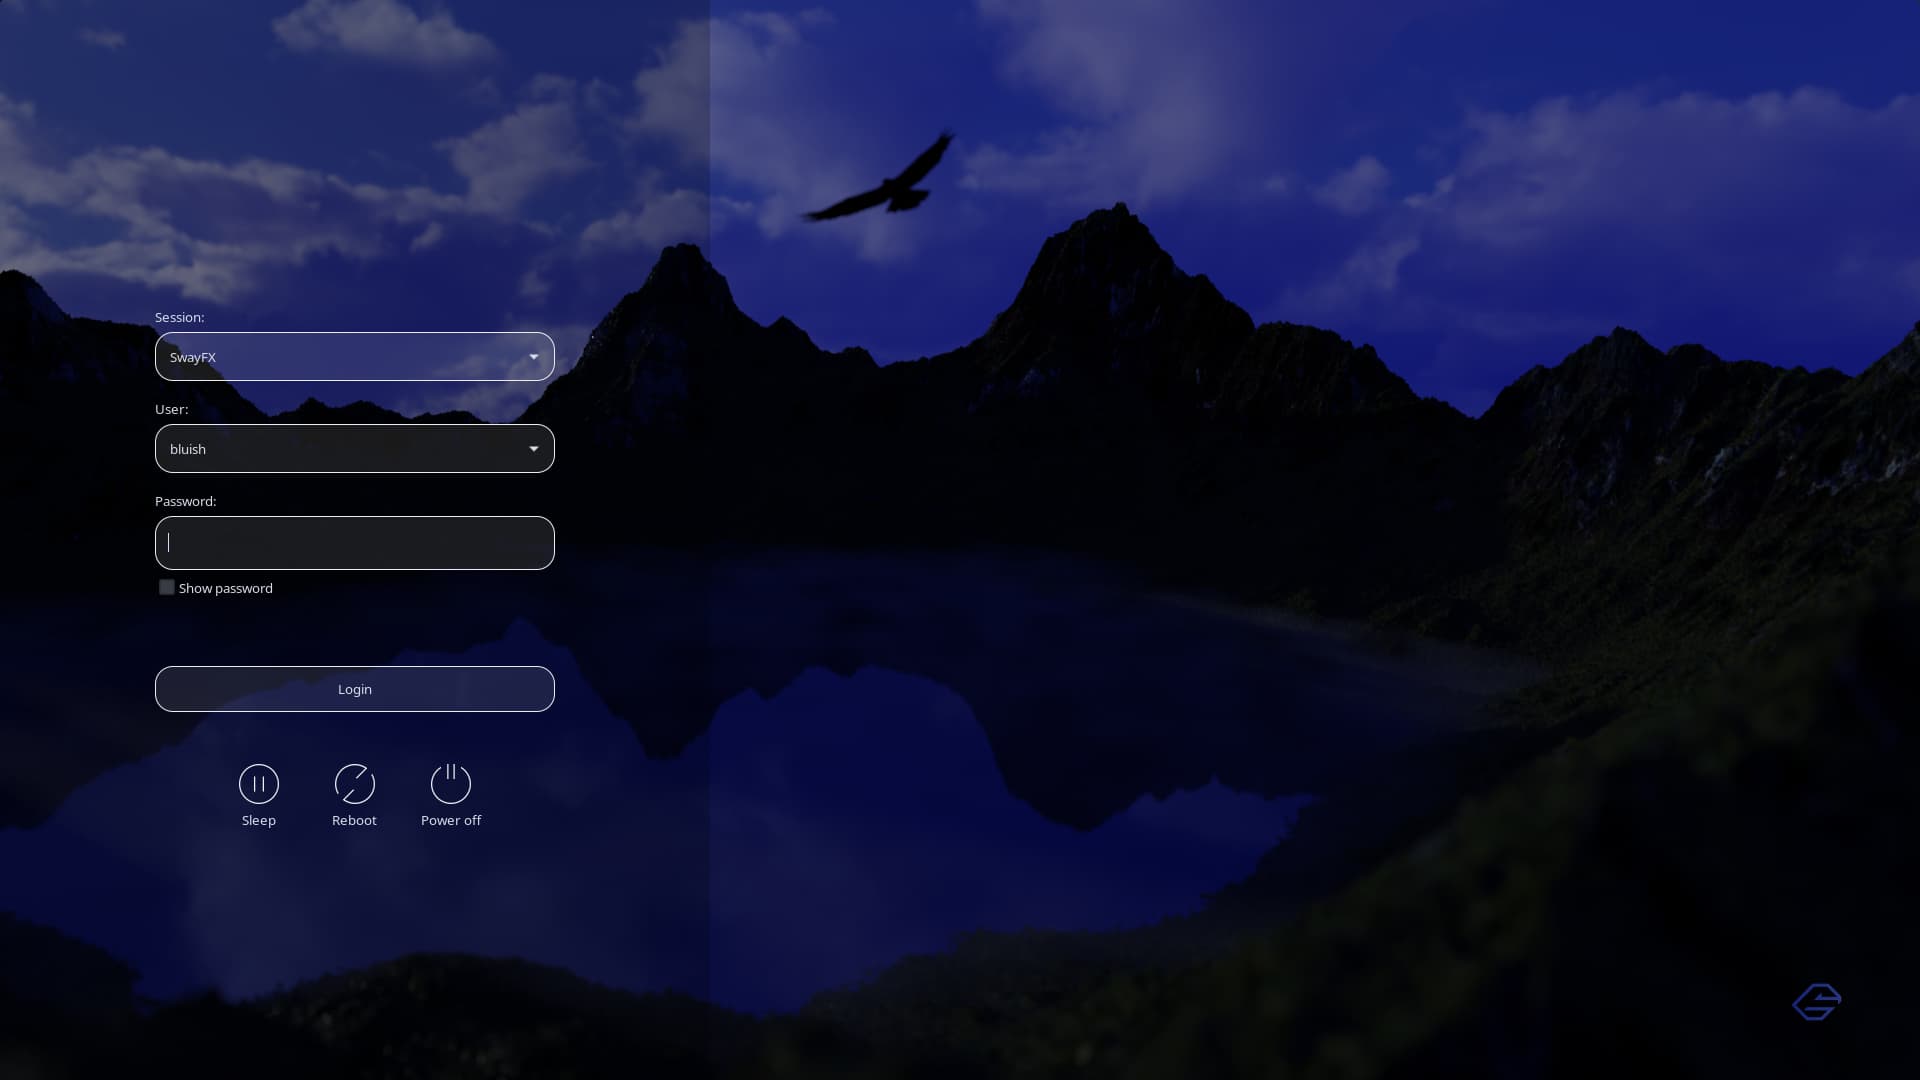
The Greetd greeter has been changed from ReGreet to nwg-hello.

Nwg-hello is another fantastic Piotr Miller project. It looks really slick and works great!


gtklock

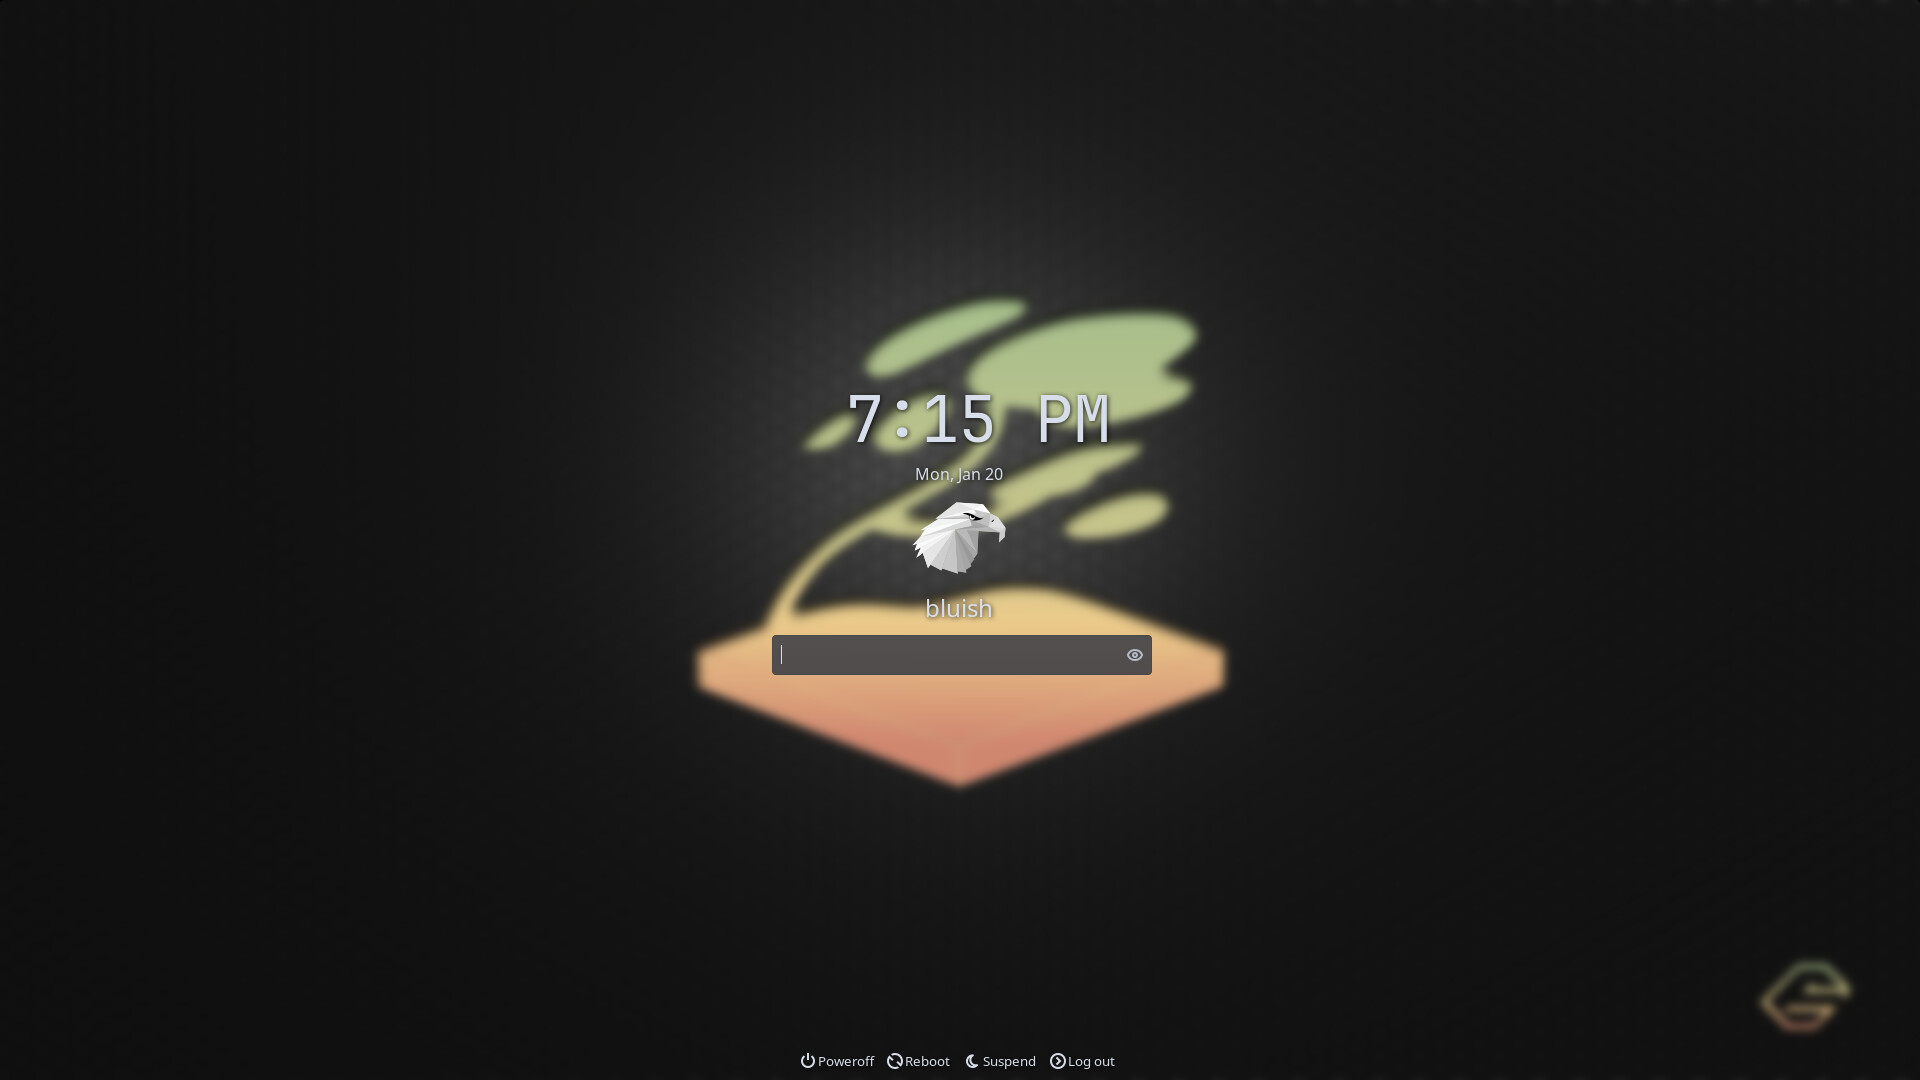
The lockscreen application has been switched from to gtklock.

Swaylock has always been fine, but lacking in features. For example, simple things like displaying the time on the lockscreen are not supported. I switched our Sway edition to swaylock-effects at some point; while it does have a lot of nice extra features, over time I have noticed several issues crop up–including the lock screen not displaying properly. Unfortunately, it doesn’t appear to be maintained anymore so I started looking for other options.

Gtklock works well and supports adding modules for incorporating extra features, like gtklock-userinfo-module for adding user info to the lockscreen and gtklock-powerbar-module for adding power controls. All in all, it has come together nicely and works very reliably.


Waybar overhaul

The waybar has a new lick of paint, featuring a cleaner look and some fancy new features.

waybar

There are so many super cool Waybar modules, but it doesn’t take long for the bar to get really crowded. To have the best of both worlds, I have added a few module groups, which can be expanded to access more modules or collapsed to hide them away.

On hover, the custom update module opens up to a second custom module with on-click actions for launching Pacseek or garuda-update. Similarly, the power module is now a group with all the power options inside.

I made a few GIFs to illustrate what I am talking about. They turned out really slow for some reason, but still get the idea across I think.

Update group and power group

uploaded image

The CPU module houses the resources group, which has modules for temperature and disk inside. This group is a click to open, then another click to collapse it shut again (so it can be left open on the bar while you are working if you wish).

Resources group

uploaded image

The settings group has a handful of modules (idle inhibitor, backlight, Bluetooth, and the tray) that are useful to have close at hand, but are not necessarily interesting or informative enough to want to look at them all day long.

Settings group

uploaded image

It’s pretty easy to move modules in and out of groups so people can make changes according to their preference.

A lot of the module tooltips have been updated as well, to call out the applications they launch with the on-click actions.


TUI apps

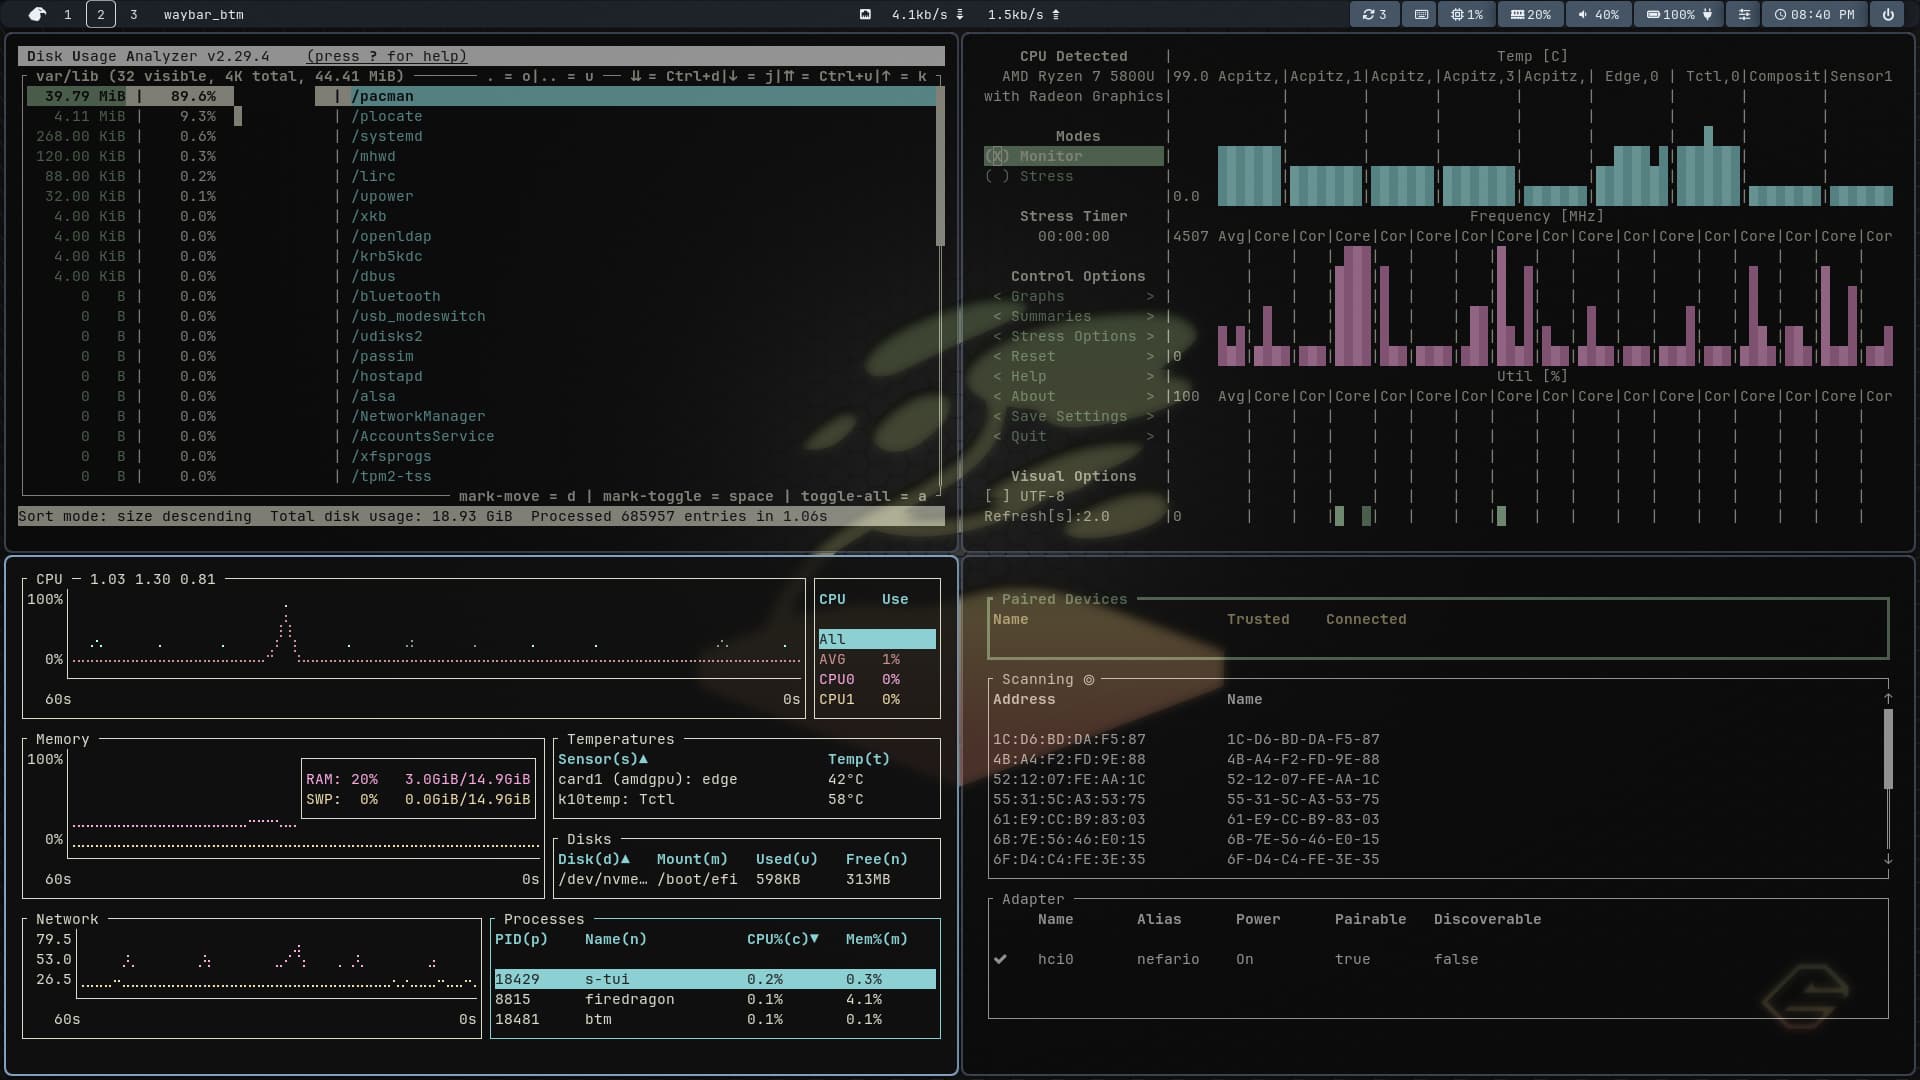
There are some new additions to the lineup of TUI apps that can be launched from Waybar modules, like s-tui, dua, bottom, battop, and bluetui.

And of course, the network module launches nmtui.


These new changes will not be in the ISO on the downloads page until the new release comes out. If anyone is interested in taking it for a spin in the meantime, you can grab the 250119 ISO off of the builds page here: https://iso.builds.garudalinux.org/iso/garuda/sway/250119/

Don’t forget, Nvidia users need to jump through extra hoops to use Sway because the Sway project officially does not support Nvidia drivers. If you have Nvidia hardware and are brave enough to jump through the hoops, you can find guidance here: Install Nvidia Drivers on Garuda Sway | Garuda Linux wiki

Comments and feedback are welcome, but for issues please open a separate topic.

17 Likes

Just a hint :wink:

is a forum member :slight_smile:

@nwg


Really? Why doesn’t anyone tell me this? :rofl:

8 Likes

Looks really good. It’s more and more polished every release.

4 Likes

Oops, maybe it is only me who is getting prepared. :face_with_hand_over_mouth:

No, someone mentioned it in the team chat–I thought it was you @SGS. :rofl:

3 Likes

Great work on sway !! :star_struck:

Hmm…just a small question, what will be the main highlight of this new release ?

Just me

5 Likes

THIS NEEDS TO BE IN r/UNIXPORN!! :heart_eyes:
On my way to try this!

3 Likes

Nice…!

Gonna have to look at those Waybar settings for myself! :slight_smile: congrats!

2 Likes

Works ¹all very well and looks very good. :+1:

Slowly, it is more and more difficult for me to decide which Garuda DE I like best. :smiley:
  • ¹ I only did not get the temperature display in the waybar. But not a big deal, I have enough other construction sites that proceed. :face_holding_back_tears:
3 Likes

I have never had to do it, but if it does not automatically find a temp you can check where specifically your system is reporting temps and add the path to your Waybar config.

https://github.com/Alexays/Waybar/wiki/Module:-Temperature#debugging

Debugging

Finding your thermal zone

To list all the zone types, run

for i in /sys/class/thermal/thermal_zone*; do echo "$i: $(<$i/type)"; done

Finding hwmon path

If you don’t have a thermal zone, another option is to use sensors to find preferred temperature source, then run

for i in /sys/class/hwmon/hwmon*/temp*_input; do echo "$(<$(dirname $i)/name): $(cat ${i%_*}_label 2>/dev/null || echo $(basename ${i%_*})) $(readlink -f $i)"; done

to find path to desired file. Then include it in hwmon-path variable.

Whichever method shows a temp for you can be added to the module config.

 "temperature": {
    "thermal-zone": 2,
    [...]

Or:

 "temperature": {
    "hwmon-path": "/sys/class/hwmon/hwmon2/temp1_input",
    [...]
2 Likes

Not my day year :rofl:

I am just on Hyprland, other notebook, and it is nearly the same :slight_smile:
IIRC there is no line with thermal-zone or hwmon-path in Sway but

"temperature": {
        "thermal-zone": 3,  // Check with: # cat /sys/class/hwmon/hwmon*/temp1_input
        "hwmon-path": "/sys/class/hwmon/hwmon3/temp1_input",
        "critical-threshold": 80,
        "format-critical": "{temperatureC}°C ",
        "format": "{temperatureC}°C ",
        "on-click": "yad --html --uri='https://wttr.in/Essen' --center --fixed --width=1200 --height=800 --timeout=60 --timeout-indicator=right"
    },

in Hyprland :grin: .
And the short

cat /sys/class/hwmon/hwmon*/temp1_input

gives me the path to temp :slight_smile: so many roads leads to Rom (Italy) :rofl:

1 Like

That’s right, I never added a path to the module config because whatever the default setting is Just WorksTM in my case.

But maybe I should at least add some commented notes to the module config with some hints if anyone needs to declare a custom path. :face_with_monocle:

2 Likes

I switched from years of KDE to Hyprland, since 0.45 came out. I am really having a hard time going back to KDE (even testing plasma 6.3 beta’s), specially since kwin does not work with Mesa 24.3 and breaks chrome GPU accel for my GPU (amd).

1 Like

Looks nice

Hello everyone, thanks for the maintainer for this excellent new release. I have been on Garuda Sway for a long time and wondering how I could implement these new changes, apps their setting etc. without reinstalling the whole system again.
Is there a preferred way of upgrading, grabbing all changes over the alraedy installed older release?
Thanks in advance

Changes are in /etc/skel/, IIRC :slight_smile:
Check .config/waybar for examaple.

OK, but for the new apps should I diff the 2 ISOs pkglist?

There is not really a great way to do this except to manually change the files one by one. Like SGS mentioned, Meld can make this a little easier for configs in /etc/skel but there is still a bit to go through, and not all configs are in there.

For configs provided by the garuda-sway-settings package, if the package is up to date you can use Meld to incorporate the new changes into your existing configs. For example, to bring your Sway and Waybar configs up to date:

meld /etc/skel/.config/waybar ~/.config/waybar
meld /etc/skel/.config/sway ~/.config/sway

These Meld commands will open the respective directories and identify any that do not match. You can open up individual files and directories with Meld to bring over individual changes you want, or copy over entire files.

If you want to switch to nwg-hello, you will need to pull down the new configs from the ISO profiles repo. Specifically, you will need all the files in the greetd and nwg-hello directories here: garuda/sway/desktop-overlay/etc · master · Garuda Linux 🦅 / Tools / iso-profiles · GitLab

Modify /etc/greetd.conf to use nwg-hello:

/etc/greetd.conf
[terminal]
vt = 1

[default_session]
command = "sway -c /etc/nwg-hello/sway-config > /dev/null 2>&1"
user = "greeter"

Create a nwg-hello directory.

sudo mkdir -p /etc/nwg-hello

Create nwg-hello.css, nwg-hello.json, and sway-config inside /etc/nwg-hello and copy/paste the configs from GitLab, or curl down the raw files to populate the directory.

curl https://gitlab.com/garuda-linux/tools/iso-profiles/-/raw/master/garuda/sway/desktop-overlay/etc/nwg-hello/nwg-hello.css | sudo tee /etc/nwg-hello/nwg-hello.css > /dev/null
curl https://gitlab.com/garuda-linux/tools/iso-profiles/-/raw/master/garuda/sway/desktop-overlay/etc/nwg-hello/nwg-hello.json | sudo tee etc/nwg-hello/nwg-hello.json > /dev/null
curl https://gitlab.com/garuda-linux/tools/iso-profiles/-/raw/master/garuda/sway/desktop-overlay/etc/nwg-hello/sway-config | sudo tee /etc/nwg-hello/sway-config > /dev/null

If you want to switch to gtklock, copy the directory out of /etc/skel and put it into your user config.

cp -r /etc/skel/.config/gtklock ~/.config/

You can also copy the default .face icon if you want to use it. This file can be any image you want to show for your profile on the lock screen; the default one is a Garuda icon.

cp /etc/skel/.face ~/

To switch to the new default wallpaper by @elite, update your Azote config.

meld /etc/skel/.azotebg ~/.azotebg

After saving the Azote config, run the script to update your wallpaper.

~/.azotebg

If you want to make sure you have the current default package set installed, you can pull down the package list from here: garuda/sway/Packages-Desktop · master · Garuda Linux 🦅 / Tools / iso-profiles · GitLab

An easy way to do this would be to curl down the raw file. For example, to create a new file called sway_packages:

curl https://gitlab.com/garuda-linux/tools/iso-profiles/-/raw/master/garuda/sway/Packages-Desktop > sway_packages

You can feed a package list directly to Pacman, but first you will have to remove the empty and commented lines or Pacman will error on them. You can open up the file and manually delete them (the file isn’t too lengthy), or use something like sed.

sed -i '/^\s*#/d; /^\s*$/d' sway_packages

Once you have cleaned up the package list, you can install any packages you are missing from the list with the --needed flag.

Like this if you are using Fish:

sudo pacman -S --needed (cat sway_packages)

Or like this if you are using Bash:

sudo pacman -S --needed $(< sway_packages)

I hope that helps, glad to hear you are enjoying the Sway edition @carlitos. :wave:

8 Likes

Wow, what an informative and thorough writeup, thanks for the detailed info and helpful instructions.
I really love this distro, especially Sway flavor, and also feel happy to be a part of an excellent community here in Garuda
I do appreciate your kind assistance and help, thank you.

1 Like

Excellent post. I’m installing Sway on a couple of older machines. Hmm actually one already has Sway from a few years back.

Excellent - Bookmark it. :saluting_face:

2 Likes