Hi there. First of all, this is not a step-by-step guide, but rather a quick way on how to customise your Fastfetch to your liking. For a detailed configuration, see its manual page, the fastfetch -h quick help, threads on this forum (maybe if it’s a problem that has happened to you, someone already asked about it here and therefore someone already answered with their solution) or video tutorials that abound on the Internet.
Of course, this explanation works as of today, but everything changes and if in the future it doesn’t work, please read the most up to date documentation, and search before asking, please ![]() Also, consider that I made these instructions under Garuda Dr460nized-gaming.
Also, consider that I made these instructions under Garuda Dr460nized-gaming.
I do it because as a newbie I found myself not understanding things well, especially how to start configuring Fastfetch… but it’s my fault, I’m very hard-headed and I don’t understand some concepts that for others are simple to understand. ![]()
As a tip, I would say read the whole post and then get to configuring your Fastfetch.
First let’s look at where you got the presets that came with Fastfetch when you installed Garuda Linux:
fastfetch --list-data-paths

/home/hudson/.local/share/fastfetch/
/usr/share/fastfetch/
/home/hudson/fastfetch/
/usr/local/share/fastfetch/
Well, that list indicates POSSIBLE places where the presets are located, and they will serve as the basis for our fastfetch, so you must know yourself where they are located. For example, let’s say they are located in:
/usr/share/fastfetch/
and inside it, we find the presets directory, so we go to where the presets are located:
/usr/share/fastfetch/presets

drwxr-xr-x    - root  1 feb 19:58 examples
.rw-r--r-- 2,1k root 26 ene 09:39  all.jsonc
.rw-r--r-- 2,0k root 26 ene 09:39  archey.jsonc
.rw-r--r-- 2,3k root 26 ene 09:39  ci.jsonc
.rw-r--r-- 2,6k root  2 feb 16:52  dr460nized.jsonc
.rw-r--r--  980 root 26 ene 09:39  neofetch.jsonc
.rw-r--r--  656 root 26 ene 09:39  paleofetch.jsonc
.rw-r--r--  745 root 26 ene 09:39  screenfetch.jsonc
Well, there are a few, you can try each and every one of them with:
fastfetch -c <any_preset.jsonc> //replace any_preset.jsonc with any of the files located in the presets directory. Hey, there’s even a directory with more examples!
I liked dr460gonized.jsonc. So this is going to be the basis for ours. So, we copy this file to another location with another name, for example:
~/Documents/Myconfig.jsonc
Now with the command:
fastfetch --list-modules
will list all the modules Fastfetch has. Edit Myconfig.jsonc and see the structure, just copy a piece, from { to the next }, and paste it below, above, or wherever you want (always following the structure of the file) changing the module you want your new Myconfig.jsonc to show. In the same way, you can remove the ones you don’t want. Even the descriptive icons and their pipelines, to adapt them to the beginning or end of each section. Copy and paste, copy and paste… you know what I mean, right?
I recommend, to start with, to make only one change and test it by running it:
fastfetch -c Myconfig.jsonc
Now we are going to change the logo on the left side.
In the location:
/usr/share/icons/garuda
There are a few very nice and elaborate logos, but you can even put a logo of your choice. At the beginning of the file Myconfig.jsonc indicates the location of our logo and the size of it, which by default comes in 24, but we can enlarge it to our liking, for example increasing it by 10 or 12 units or more. Or less if you see it too big.
Well, we already have our custom file. So we’ll save our Myconfig.jsonc file in the presets directory (/usr/share/fastfetch/presets) because we’ll need it in a moment, for fish.
But if we execute:
fastfetch
we will not get that configuration that we have worked so hard to fine-tune. For that now we have to do the following:
WARNING! Please, before overwriting or deleting any files, make a backup copy of them in a safe place, so in case of need, you will be able to revert any changes.
Copy Myconfig.jsonc over:
~/.config/fastfetch/config.jsonc
If you have never touched the configuration, this path and its file will not exist. To create it, first run:
fastfetch --gen-config
Now we will have ~/.config/fastfetch/config.jsonc
The trick is to change the contents of config.jsonc to our Myconfig.jsonc file, and so every time we run:
fastfetch
Our chosen configuration will be displayed.
If we also want to change the behaviour of fish every time we open a new terminal window, we just need to change the fish configuration file:
~/.config/fish/config.fish
Right at the end config.fish is where we change the path to the preset we are using, in our case to Myconfig.jsonc. Do you remember? You saved Myconfig.jsonc in the presets directory.
Change the line:
fastfetch --config dr460nized.jsonc to fastfetch --config Myconfig.jsonc
So, it should look like this:
## Run fastfetch if session is interactive
if status --is-interactive && type -q fastfetch
fastfetch --config Myconfig.jsonc
end
This is mine:
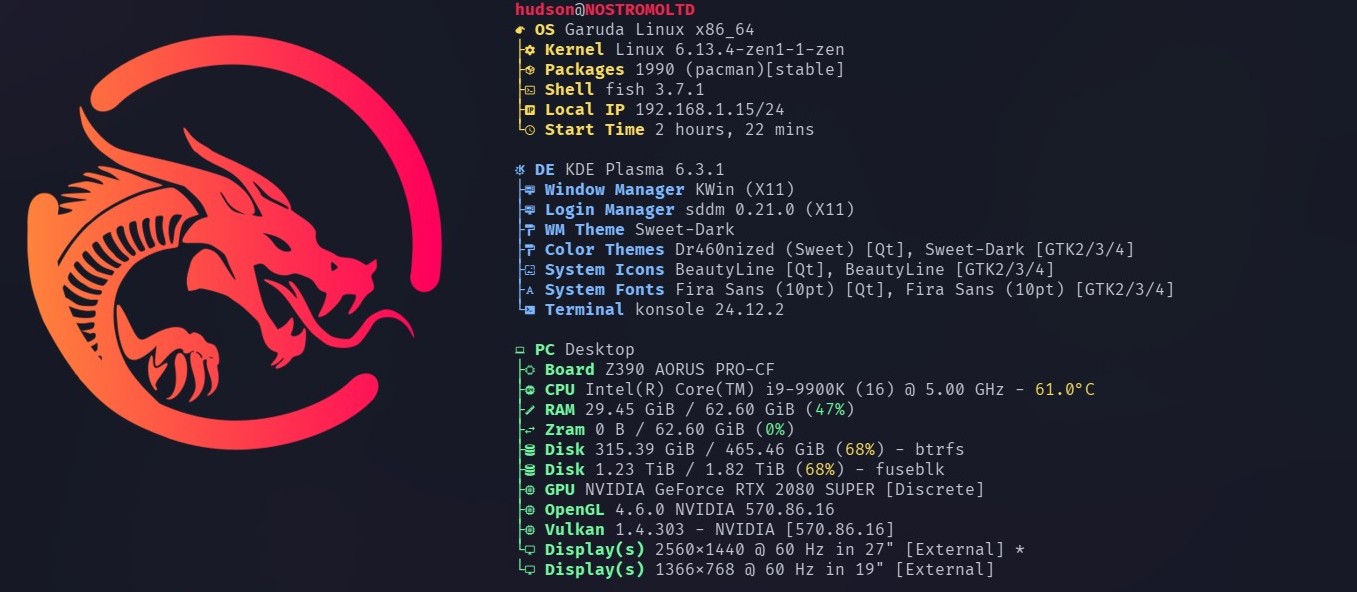
...And my config.jsonc
{
"$schema": "https://github.com/fastfetch-cli/fastfetch/raw/dev/doc/json_schema.json",
"logo": {
"type": "kitty",
"source": "/usr/share/icons/garuda/dr460nized-start.png",
"width": 48
},
"display": {
"separator": " "
},
"modules": [
{
"type": "title",
"keyWidth": 10
},
{
"type": "os",
"key": " OS",
"keyColor": "yellow"
},
{
"type": "kernel",
"key": "├ Kernel",
"keyColor": "yellow"
},
{
"type": "packages",
"key": "├ Packages",
"keyColor": "yellow"
},
{
"type": "shell",
"key": "├ Shell",
"keyColor": "yellow"
},
{
"type": "localIP",
"key": "├ Local IP",
"keyColor": "yellow"
},
{
"type": "uptime",
"key": "└ Start Time",
"keyColor": "yellow"
},
"break",
{
"type": "de",
"key": " DE",
"keyColor": "blue"
},
{
"type": "wm",
"key": "├ Window Manager",
"keyColor": "blue"
},
{
"type": "lm",
"key": "├ Login Manager",
"keyColor": "blue"
},
{
"type": "wmtheme",
"key": "├ WM Theme",
"keyColor": "blue"
},
{
"type": "theme",
"key": "├ Color Themes",
"keyColor": "blue"
},
{
"type": "icons",
"key": "├ System Icons",
"keyColor": "blue"
},
{
"type": "font",
"key": "├ System Fonts",
"keyColor": "blue"
},
{
"type": "terminal",
"key": "└ Terminal",
"keyColor": "blue"
},
"break",
{
"type": "chassis",
"key": " PC",
"keyColor": "green"
},
{
"type": "board",
"key": "├ Board",
"keyColor": "green"
},
{
"type": "cpu",
"key": "├ CPU",
"keyColor": "green",
"temp": true,
"freqNdigits": 1
},
{
"type": "memory",
"key": "├ RAM",
"keyColor": "green"
},
{
"type": "swap",
"key": "├ Zram",
"keyColor": "green"
},
{
"type": "disk",
"key": "├ Disk",
"keyColor": "green"
},
{
"type": "gpu",
"key": "├ GPU",
"keyColor": "green"
},
{
"type": "opengl",
"key": "├ OpenGL",
"keyColor": "green"
},
{
"type": "vulkan",
"key": "├ Vulkan",
"keyColor": "green"
},
{
"type": "display",
"key": "└ Display(s)",
"keyColor": "green"
},
]
}
“Wait a minute, there are icons that I don’t know where they come from, like the disk indicators, is that the KDE one?, and Garuda!?” Yes, they are. I customised them too. ![]() How did I do that?
How did I do that?
Well, here I did it with less or better success, depending on how you look at it, but I like it and that’s what it’s all about, that the final result pleases you, right? ![]()
For this I use (I’m sure someone knows a better or more efficient way, if you show it to me, I’ll learn that too) LibreOffice - Writer:
Insert menu - Special character (sorry, the screenshot is in my language)
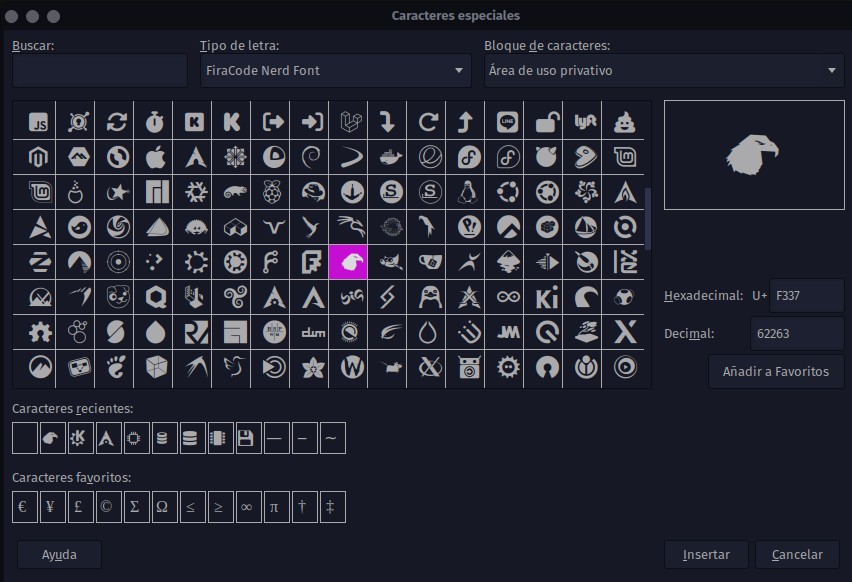
Choose the font, for example FiraCode Nerd and at the bottom, in the symbol map, scroll down with the cursor until you see the icons you like. You insert it in the document. Copy and paste and replace the one you want in your Myconfig.jsonc file.
And finally…
Thanks for reading. ![]()
